Viewing entries tagged
best sony shooters

Hands on Review of the Sony A6400- why it's the best crop sensor camera of the Sony Mirrorless lineup by Jason Lanier

3 Comments

Hands on Review of the Sony A6400- why it's the best crop sensor camera of the Sony Mirrorless lineup by Jason Lanier

When the Sony A6400 was announced I’ll be the first one to admit that I was a little confused as to what this camera had to offer. Just the name alone made it confusing for me to comprehend why Sony would release a camera that came in between the A6300 and the A6500. I mean, what’s the purpose of this camera?

A little while ago I had the opportunity to get my hands on one of them to give it a go. This camera quickly became my favorite of the Sony crop sensor cameras. To watch the entire review please click the video below:

The A6400 replaces the A6300 and while the body form factor remains relatively unchanged, there are some big changes on the tech side and the screen that make this a very interesting camera.

The big news from this camera is the update to the eye auto focus and the screen. This is Sony's first offering of a complete flip up screen that makes it useable for vloggers out there.

The other exciting news is that this camera has the same processor as Sony'f flagship camera, the A9. This makes it the fastest of any of the crop sensor Sony cameras and also improves the battery life nearly doubling the total expected shots from the camera on one battery charge.

Here are the things about this camera that really impressed me:

  • Eye Auto Focus- no need to hit a secondary button to engage the eye auto focus. This makes using this very valuable function easier than ever and also more accurate. You now even have the capability to toggle back and forth and choose which eye you would like in focus. THAT is COOL!

  • Flip Up Screen- Yay! We finally have a flip up screen on a modern Sony mirrorless camera. This makes it the first camera for vloggers and photographers like me who actually record a lot of video with their camera. One of the most annoying things for me personally is to keep having to go behind the camera to check for audio signals, to make sure the camera is recording etc. Having a screen that I can see as I record is a big bonus for me,

  • No Time Limit Recording on Video Mode- I always take a camcorder with me wherever I go because there are times when I need to record for longer than 30 minutes. The A6400 is the first Sony Mirrorless that now extends this video capability to a non camcorder body. This is one of the main reasons why I’ll be buying this camera. The ability to now use a camera like this with all of my pro level lenses is a big advantage for me over using the standard lens that comes on a camcorder and will up my video game for sure.

  • A9 Processor- The processor that is in Sony’s most advanced camera, the Sony A9, is now the same processor in this little guy which kinda blows me away. This results in much faster auto focus, better tracking, a better buffer and a much better battery life! This is the first breakthrough on battery life from the original small body cameras that we’ve seen and I’m sure will be celebrated by crop sensor shooters out there everywhere.

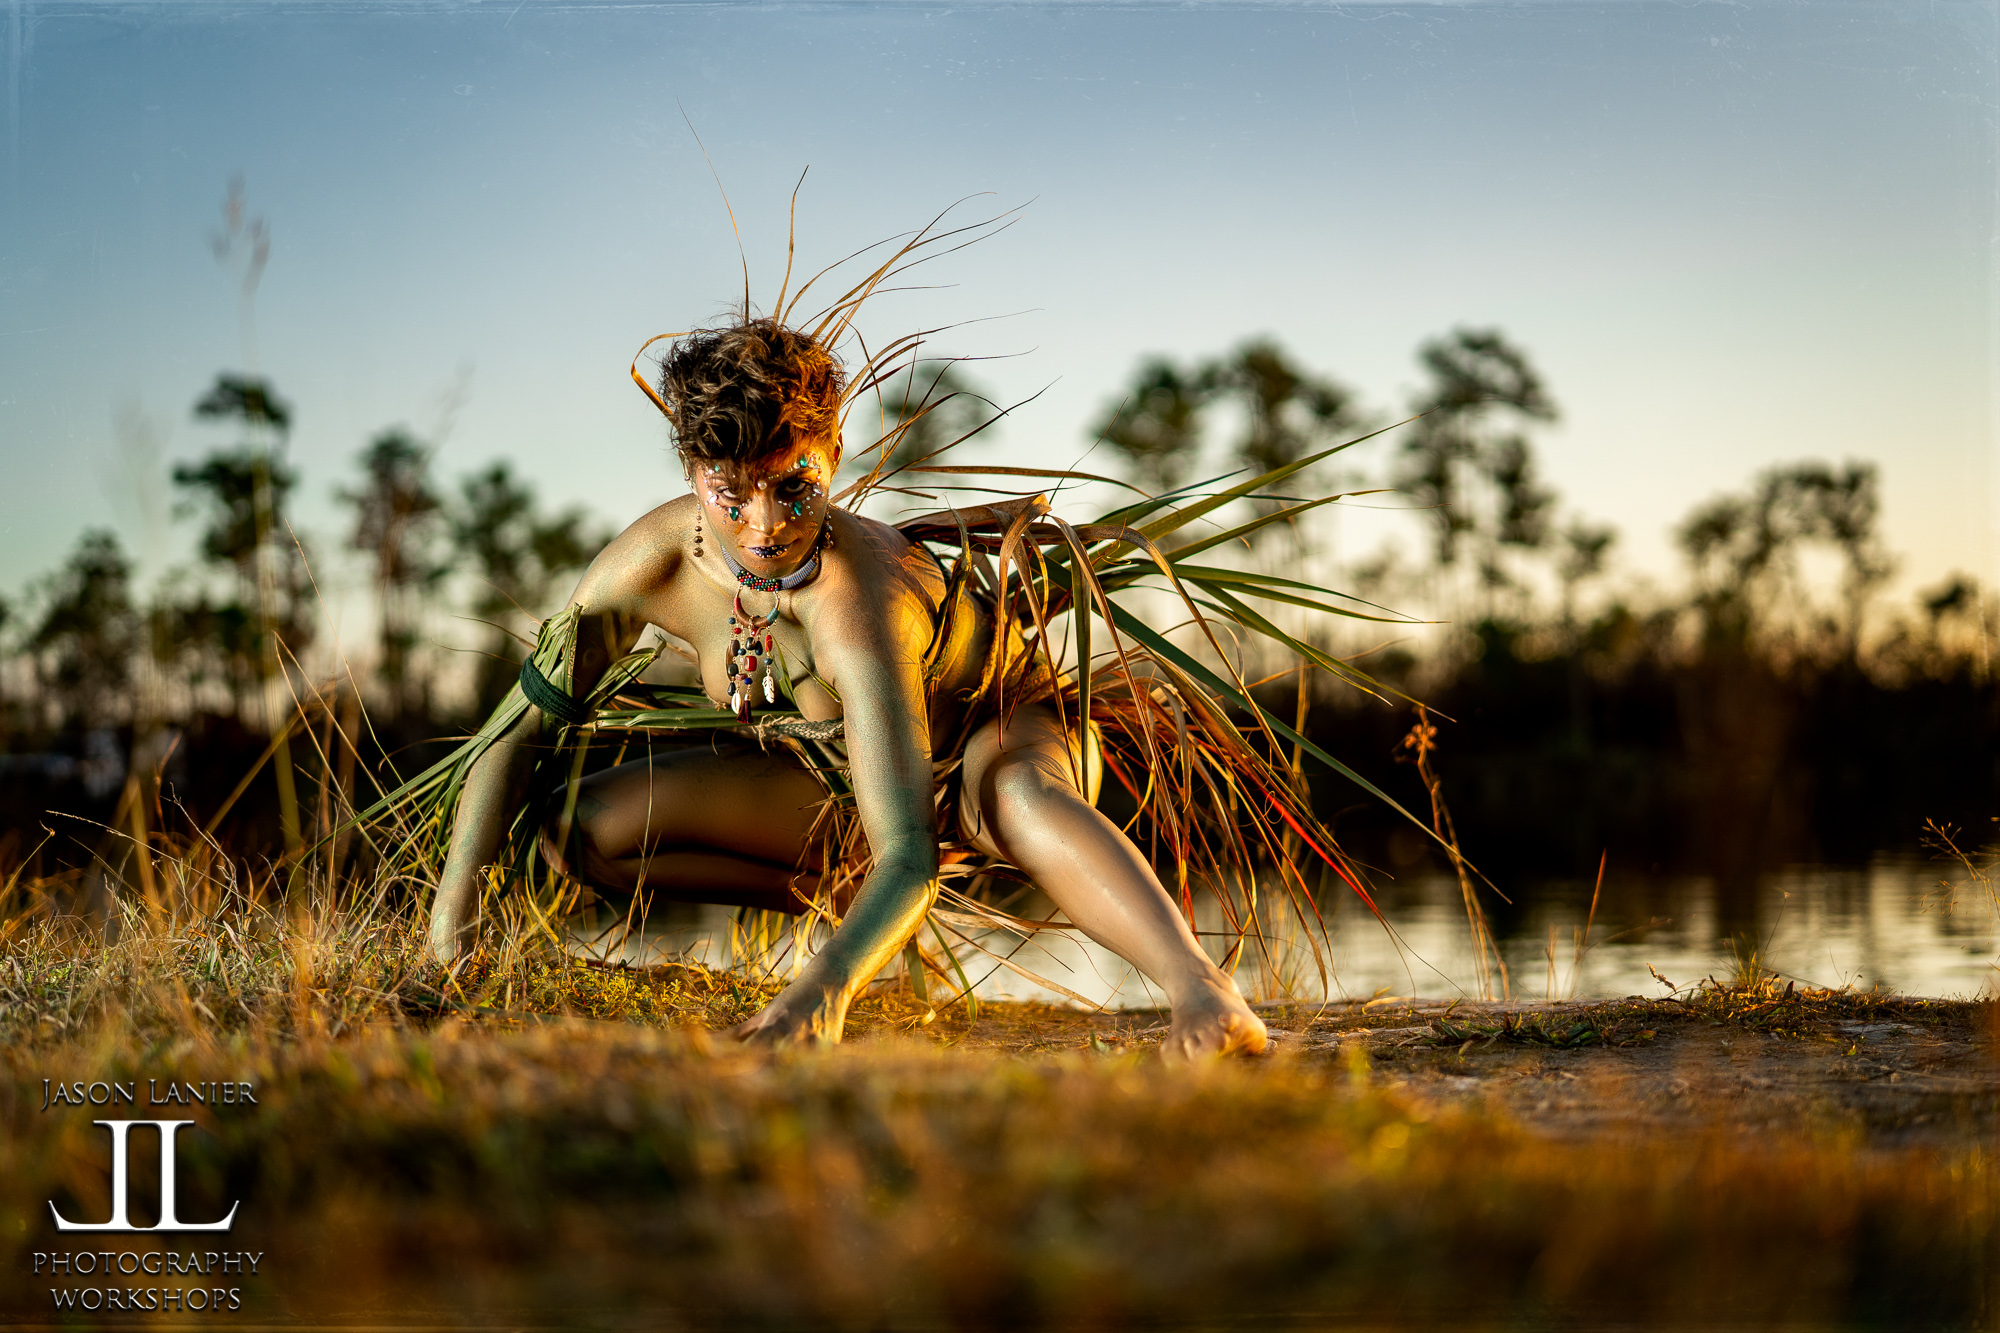
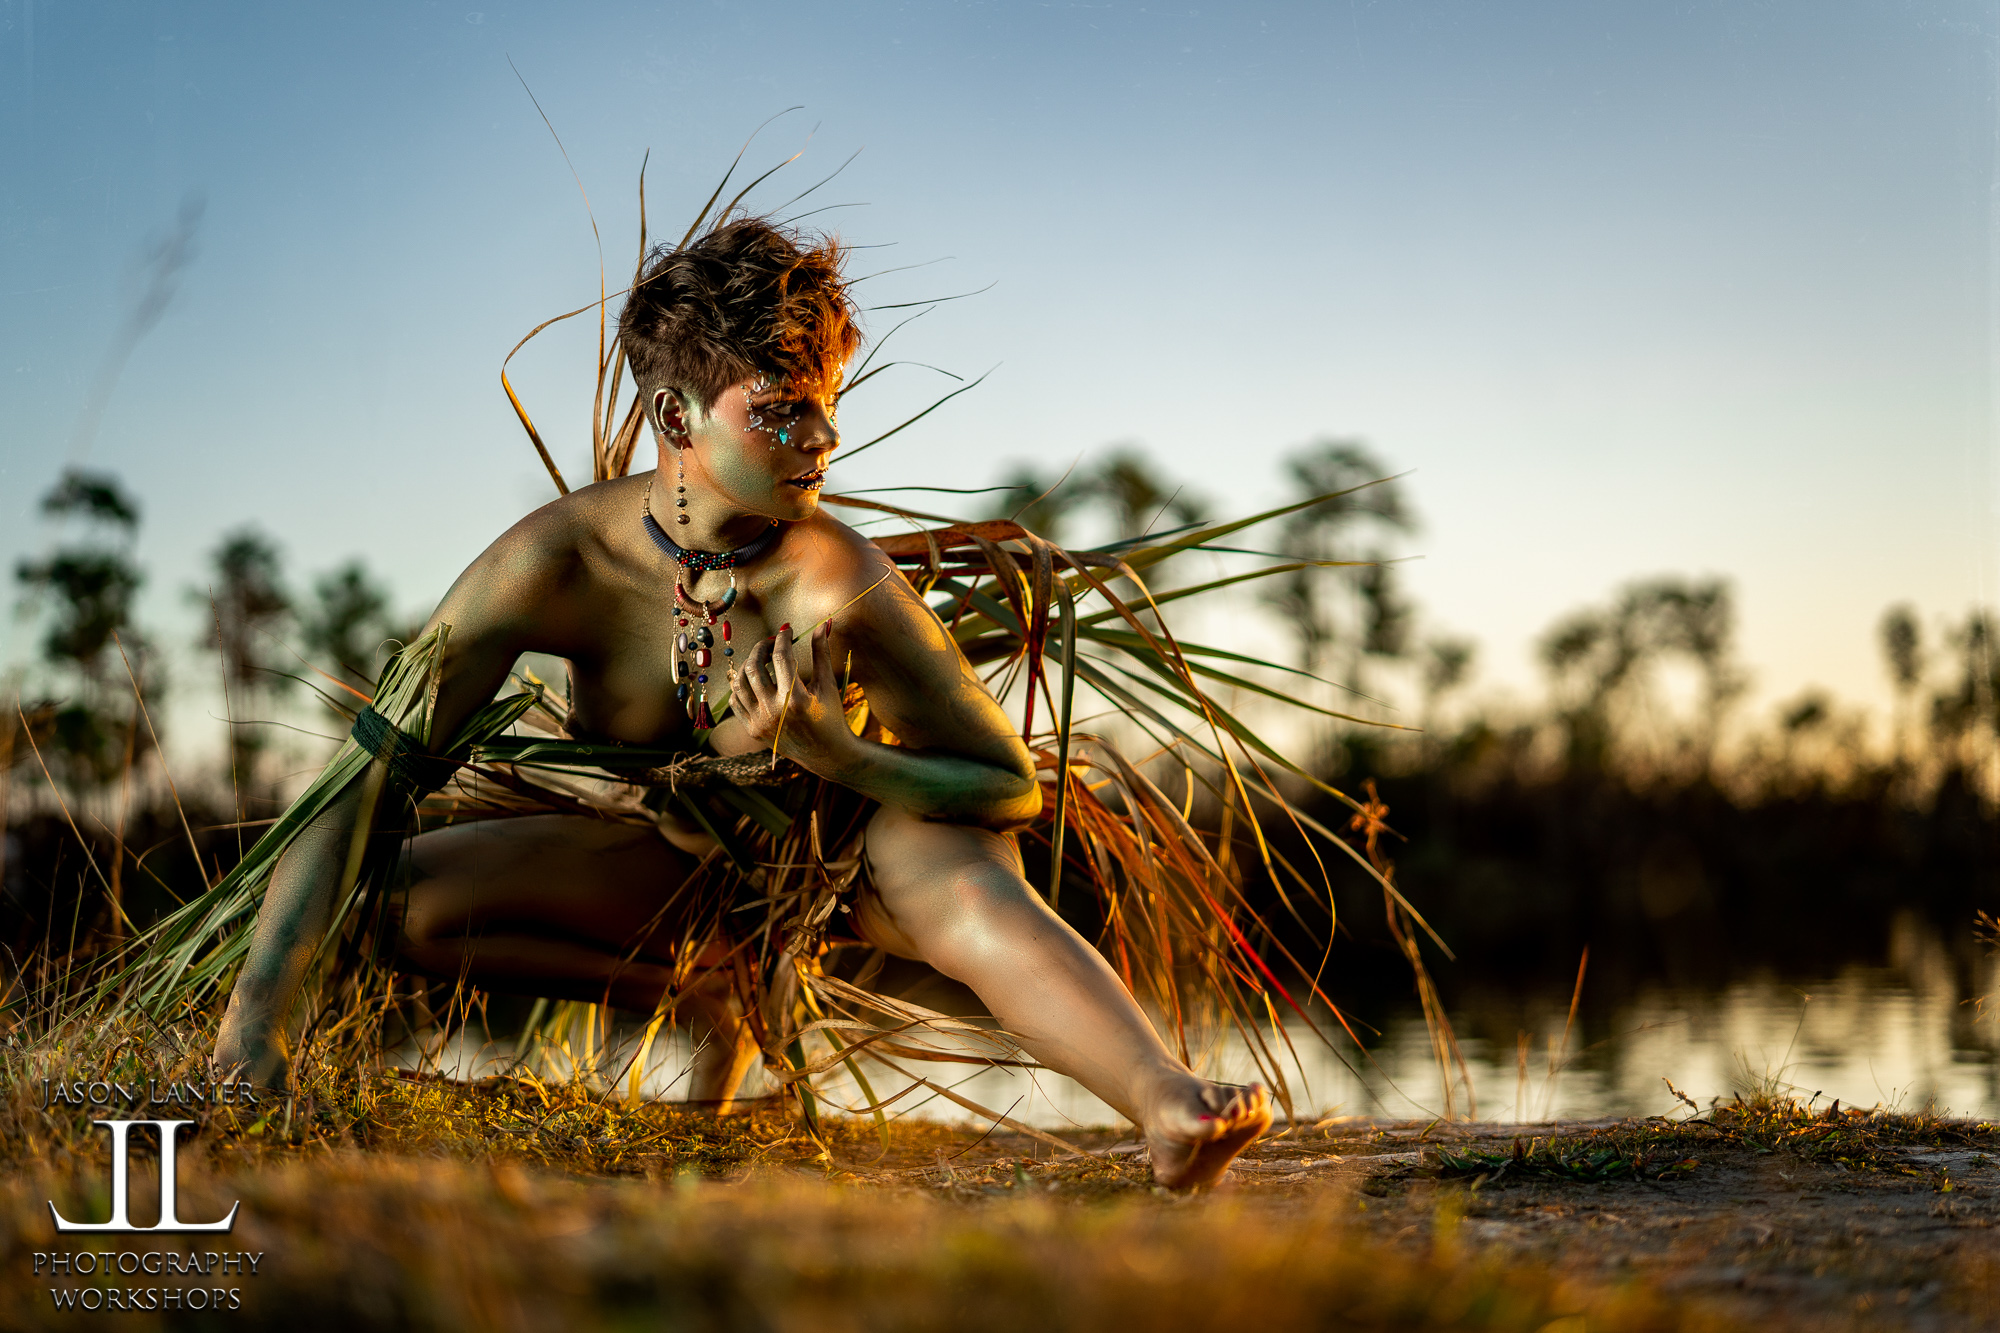
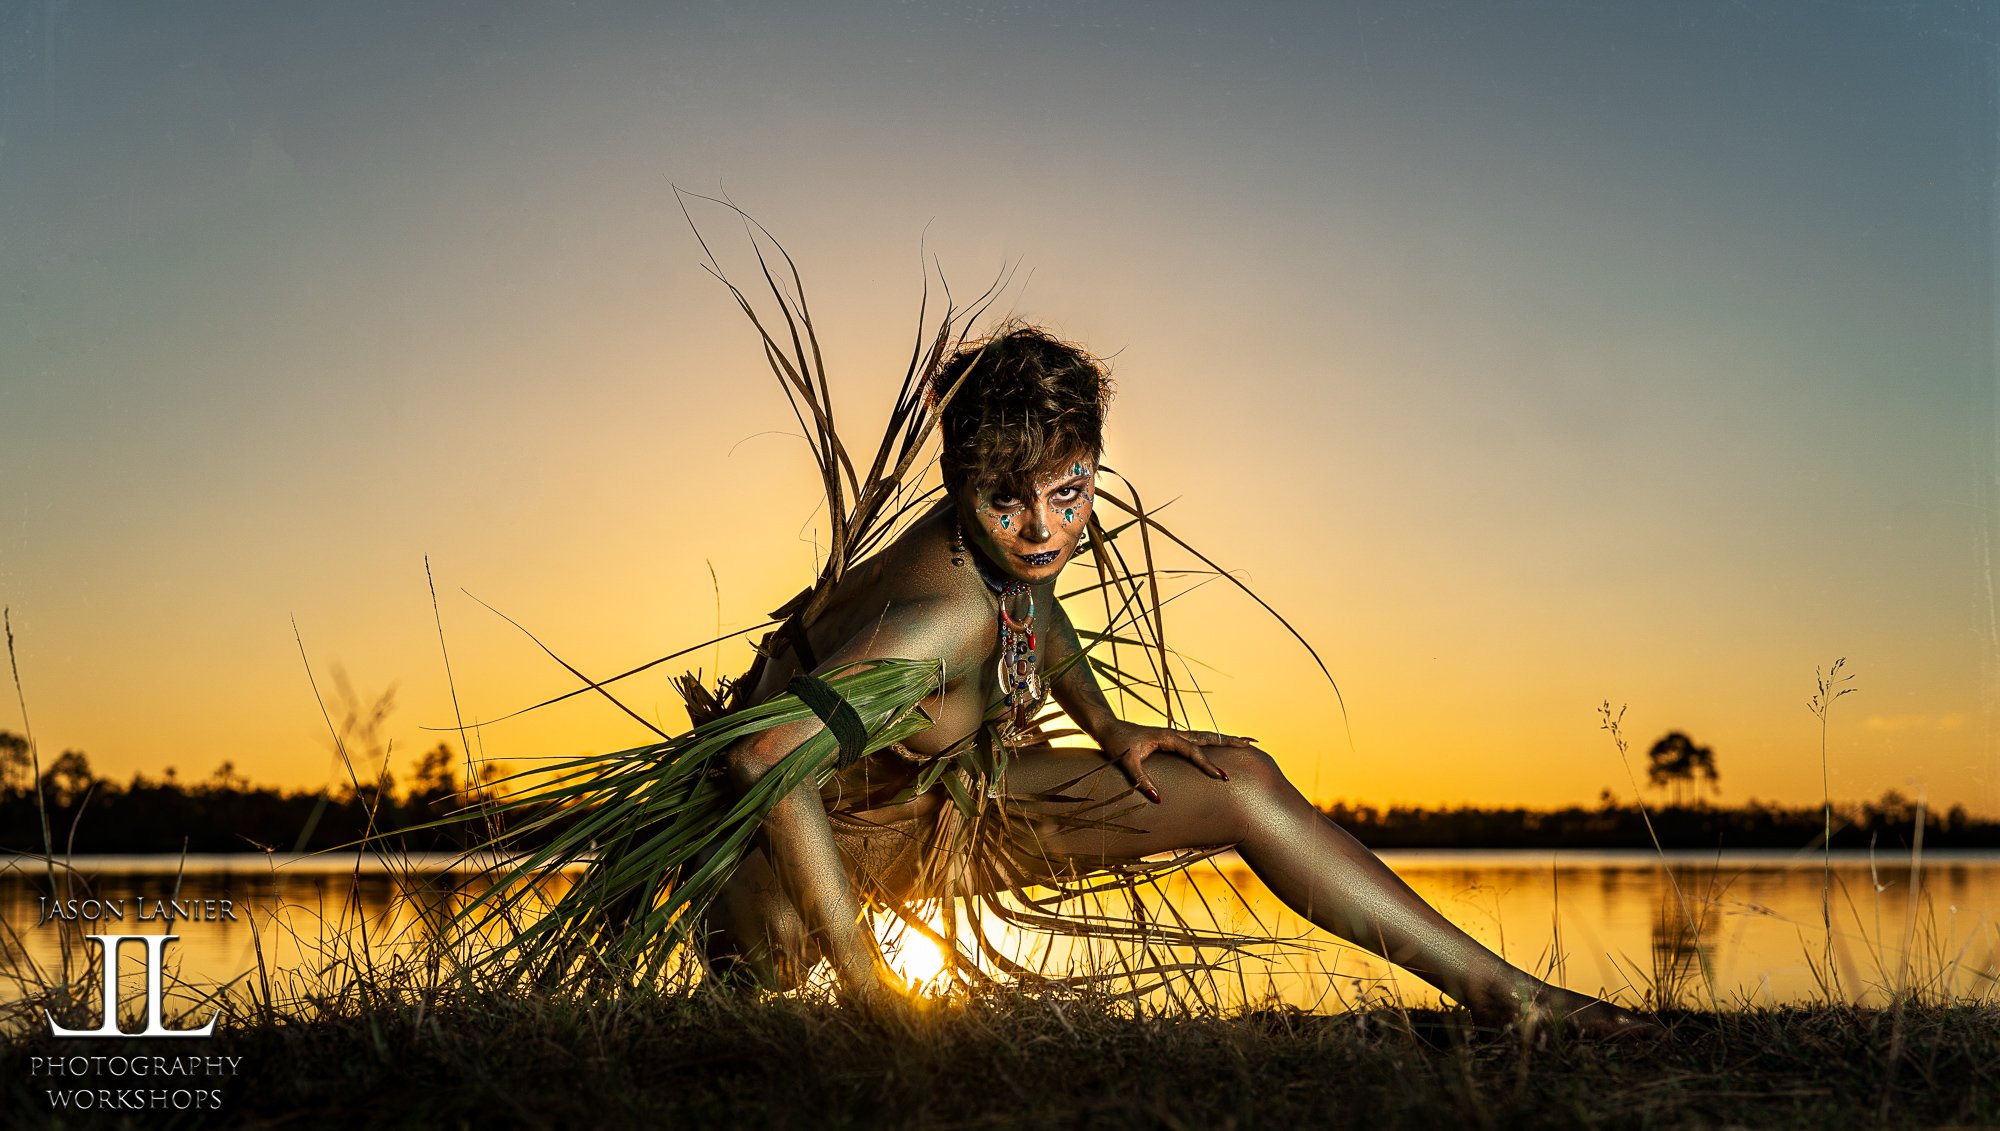
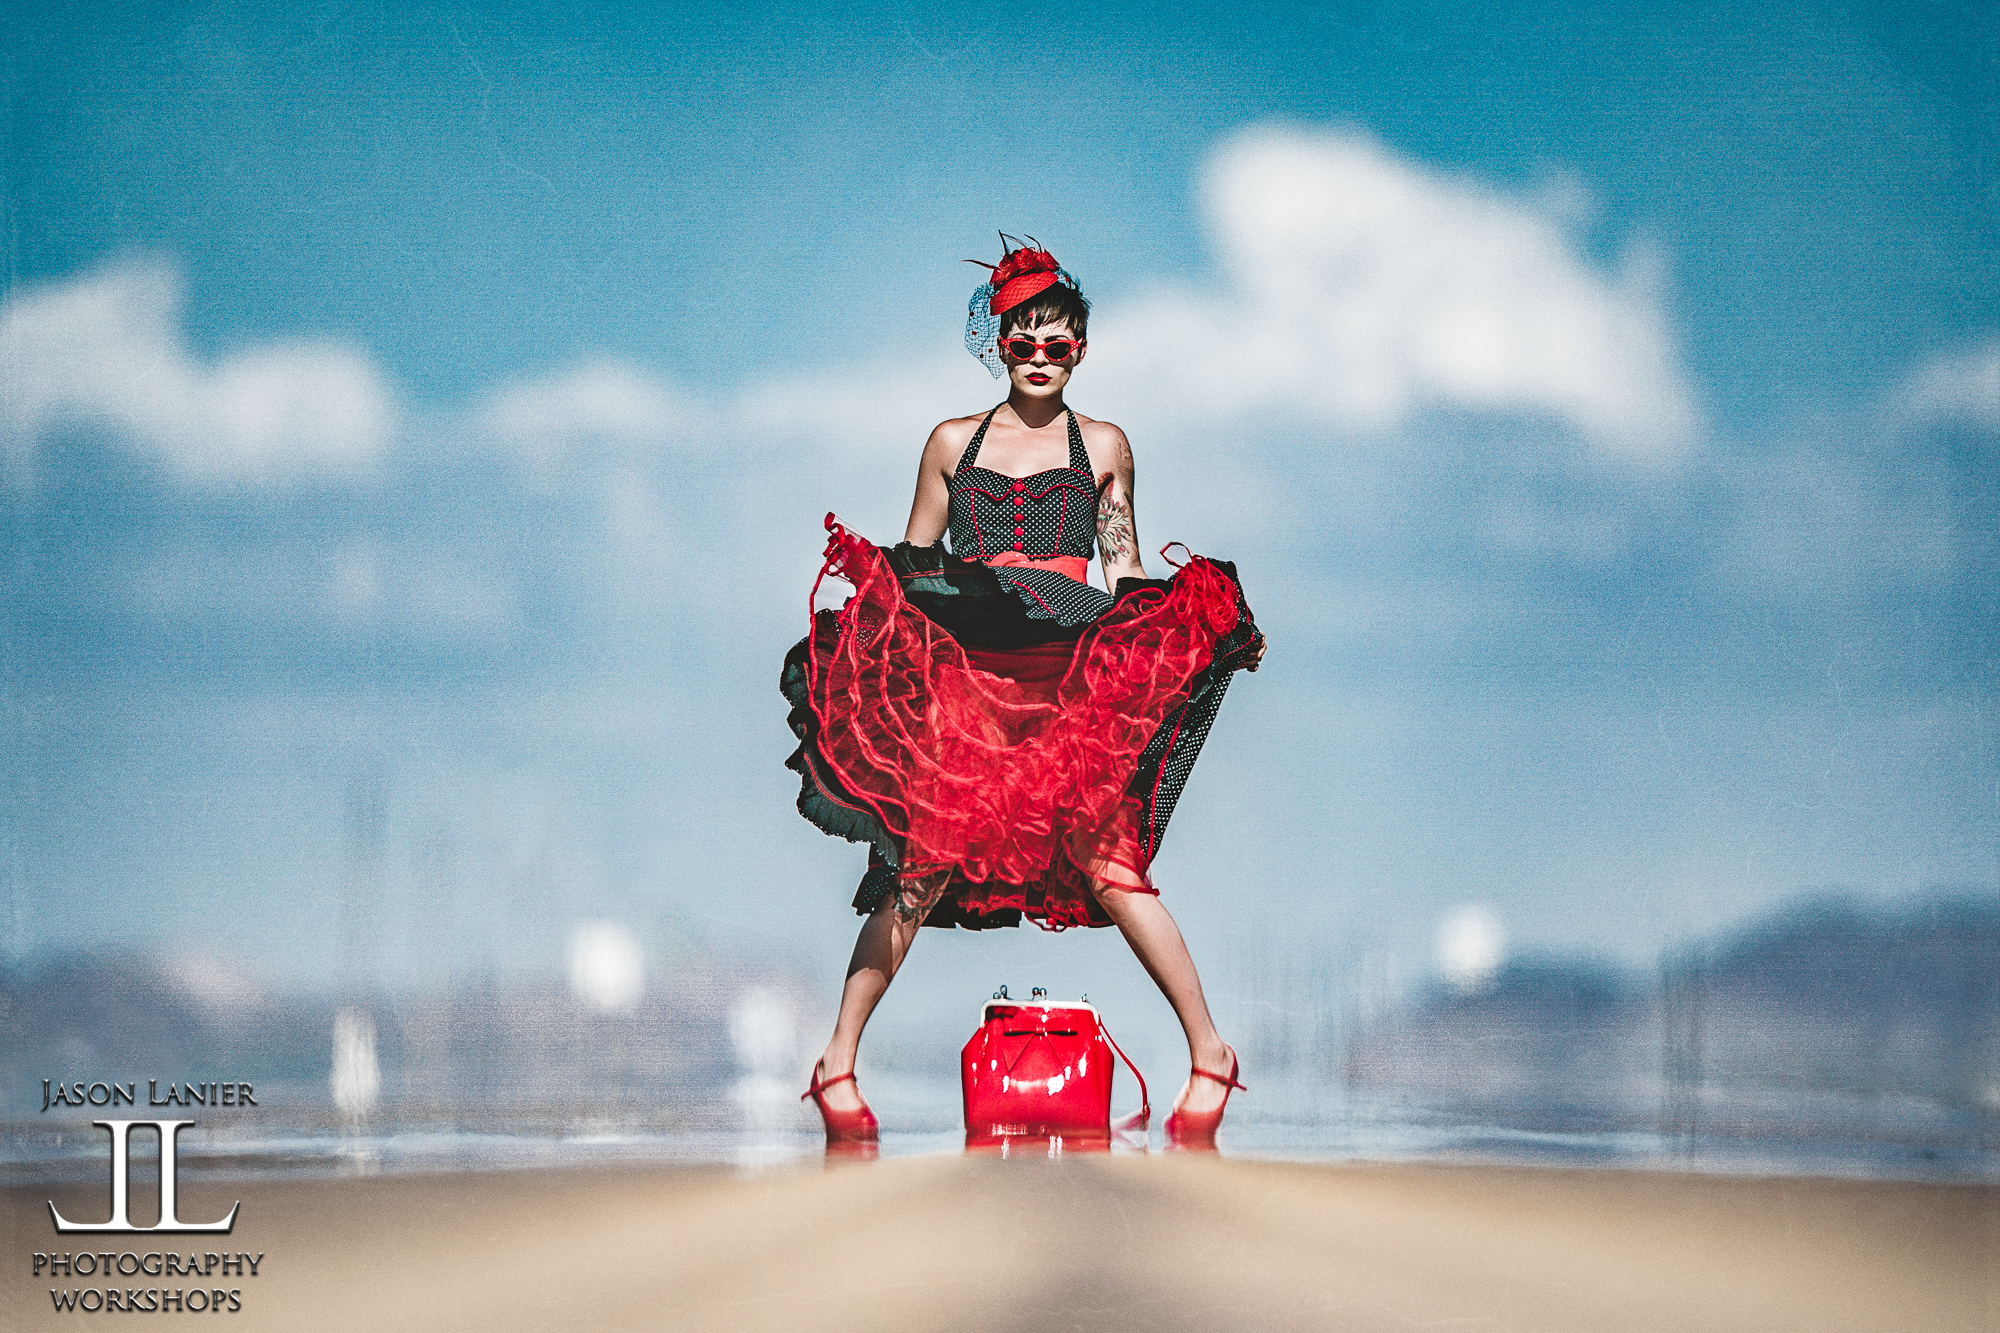
  • ISO Performance- I was really impressed that a crop sensor camera was giving me the ISO performance that I was able to get with some shots using this camera. Below are some shots taken at ISO 4000 with no noise reduction that shows some pretty clean images. This is the best I’ve found so far on the Sony crop sensor bodies.

  • Video Functionality- given the advances in auto focus tracking, no time limit on recording, better battery life, etc. this camera aims to be a vloggers dream. It also has 4k video with S Log which will make the more serious videographers out there very happy. It does NOT have IBIS (In Body Image Stabilization) which will disappoint some, but the lack of IBIS is one of the main reasons the camera costs less than the A6500. If you’re serious into video work you’ll most likely be using a camera like this on a gimbal anyways so you shouldn’t need it too much anyways.

Images taken at ISO 500

Images taken at ISO 4000

**Links to Gear**

Lighting: to receive 10% off and FREE shipping please visit www.rotolight.com and enter the promo code: jasonlanier10

*Sony A6400- https://bhpho.to/2IKCRBg

*Sony 135mm G Master- https://bhpho.to/2IPq3d5

*Sony 35mm Zeiss- https://bhpho.to/2IDrv28

*Sony 50mm Zeiss- https://bhpho.to/2FmytlK

Gear Used to Record the Video:

*Sony A9- https://bhpho.to/2oOdnGF

*Sony 24-70 G Master- https://bhpho.to/2tVmFpj

*Sony AX33 Camcorder- https://bhpho.to/2IBQOgP

Summary:

Given the price, the improved technology and tilt screen, I believe the A6400 is the best crop sensor camera that Sony has to offer. I would buy and use it all day over the A6500 due to it’s flip up screen, improved battery life, faster processing, eye auto focus and more. It also is significantly cheaper which makes it a much more viable option for many photographers out there.

It is hands down a quantum leap in technology and performance over the A6000 and takes it’s place as the best bang for your buck in the Sony crop sensor marketplace. It will be the crop sensor camera in my bag and I’ll be placing the A6500 aside for now. Some people will miss the IBIS in the camera, but I think they’ll appreciate the drop in price more.

I hope this has helped. Make sure to take a moment to check out my Youtube Channel if you haven’t already. www.youtube.com/jasonlanierpros. Also make sure to give a follow to my Assistant Emily on Instagram at @em.explores as well.

So what do you think? Let us know by writing in the comments below. Thanks for visiting us here!

Jason

3 Comments

Feathering Your Lighting- How to shoot your flash from the ground up by Jason Lanier

1 Comment

Feathering Your Lighting- How to shoot your flash from the ground up by Jason Lanier

Most experienced photographers know that when you use artificial light you should place it above your subject. That’s because when you do so, you are creating a lighting pattern that casts shadows down on your subject.

But there is a lighting technique called Feathering Light. That technique is utilized by having the edges of your light paint light onto your subject. This is done to minimize the effect of using light with your subject and even more importantly on the canvas of your image.

For example, if you want to do a shoot and don’t want there to be light spill or shadows on the ground coming from the flash, you would feather the light. This technique can also include facing the light up or even placing it on the ground so the light is shooting up.

Check out the video above of the shoot that I did in the Everglades which shows exactly what I’m talking about. This was a crazy shoot with my Model Emily who painted herself up and used palm fronds on the ground to create an amazing outfit.

This was done using the Godox AD 600 Pro flash inside of the Westcott Rapid Box XXL modifier with three layers of diffusion; the deflector plate, the inner baffle and outer sock.

As you’ll see in the video I use the edges of the light modifier to cast light onto Emily vs. what I’d normally do which is use the center of the light source. Below are the resulting images from the shoot. I’m breaking them into categories based upon the lens used.

Shots using the Sony Zeiss 50mm:

Shots using the Sony G 12-24mm lens:

Shots using the Sony Zeiss 35mm:

I really hope this helps some of you out there to explore some alternative ways of lighting. The pros to lighting like this include creating some dynamic shots in a way that allows your ground area to remain dark. The cons are that you have to be careful of where and how your shadows fall on your subject.

Immediately following this shoot we did a live video blog/podcast. To check that out click below:


Thanks for visiting my blog. I really appreciate your support and thank you in advance for your comments and for sharing the content with someone you think can benefit from it. To learn more with us online please visit www.patreon.com/jasonlanierphotography.

To learn with us in person please visit www.jasonlanier.com/register.

We’ll see you soon!

Thanks,

Jason

1 Comment

Shooting the Lightweight Beast- my shoot with the Sony 400mm f/2.8 G Master lens by Jason Lanier

5 Comments

Shooting the Lightweight Beast- my shoot with the Sony 400mm f/2.8 G Master lens by Jason Lanier

I’m writing this blog in the early parts of December 2018. But once upon a time back in August of 2018, it was still VERY HOT. My Assistant Emily and I found ourselves in the middle of NOWHERE on the side of the road in Arizona. The temperature gauge inside of the car was telling us it was 115 degrees and boiling hot…but I digress.

Sony was gracious enough to lend me the 400mm f/2.8 lens for a few days for me to go out and test this thing. I already own the Canon 400mm f/2.8 so being able to play with this lens was a treat.

Questions abounded:

*If I already own a 400mm f/2.8, do I REALLY need to spend the amount of money as I would on a good used car to buy this lens?

*Is it really THAT much better than my Canon lens? I mean, this thing ain’t cheap.

So while driving down the road heading back to a cooler California, we saw this abandoned gas station and of course we HAD to go and shoot at it.

The first challenge was COMMUNICATION. I mean let’s face it, the 400mm wasn’t necessarily meant for doing portraits. BUT, I wanted a challenge rather than do the typical thing that most people do with this lens.

**Performance- From a performance perspective this lens hit all of the checkboxes. It focuses very sharp and very fast, has all the bells and whistles that you’d want on a premium lens and it is LIGHT! We weighed this thing and it was pretty much HALF of the weight of my Canon 400mm f/2.8. Why does that matter? Well, it actually makes the Sony 400mm f/2.8 the first lens in that range that can actually be used for handheld purposes. Why would you want to do that? Simple. It would be for the ability to be able to quickly change and shoot in areas like safari wildlife and sports. Having done both professionally in the NFL and in South Africa, I can attest to the fact that wielding a heavy lens and having to maneuver a monopod or tripod can mean missing some crucial shots.

Below are the images taken with the lens using the Sony A7Riii. The first three shots are with flash. The rest are without. If you’d like to see and know why check out the video above where the light takes a big FALL.

**VALUE- let’s not beat around the bush. This lens is EXPENSIVE. While it’s in the same stratosphere as it’s Nikon and Canon equivalents…all of these lenses are for the super pro who has a very particular need. So for pro wildlife and sports photographers who make their money shooting with the very best lenses this is a must have. For the average person out there the Sony 100-400 G Master is a great lens that is more versatile. The shots aren’t as special as they are coming out of the 400mm f/2.8, but they are very nice and the lens is about 25% the cost of the 400mm f/2.8. The other advantage of the 100-400mm is it is much more versatile for wider images which I did find very useful when I used it on safari in Kruger National Park in South Africa in July of this year.

A BIG thank you to Emily for braving the insane heat and giving me yet another epic performance. She is the BEST in every sense of the word. To follow her please visit www.instagram.com/em.explores today.

Please take a moment to let us know what you think by dropping a comment down below. Don’t forget to click on SUBSCRIBE AND NOTIFICATIONS so you’re updated every time we release a new video on Youtube. You can find our channel now by visiting www.youtube.com/jasonlanierpros. Please let me know what questions you have. If you have the money, this lens is phenomenal.

Thanks!

Jason

5 Comments